

Check out today’s video and learn how to balance being a parent, CEO, spouse and more.


Heart Shaped Dog Valentine Craft

Supplies Needed:
- 2 white pom poms (I used sparkly kind)
- 1 black pom pom
- Pink and white card stock paper
- Scissors
- Glue
- Googly eyes
Cut out a white heart for the dog’s face and two pink hearts for the ears. Glue them on as well as the pom-poms and a pink paper tongue! Add the googly eyes and he’s ready to go!
Share this:


CRAFT STICK RAINBOW CRAFT
Are you looking for a fun craft? Check this out!
Rainbow craft sticks makes this a mess free and super easy craft for kids to create.
- Cut out two cloud shapes the same size from a white foam sheet. Use tacky glue to glue a red, orange, yellow, green, blue and purple craft stick in a line at the bottom of one of your cloud shapes.
- Add tacky glue all over the cloud and craft sticks.
- Then line up and glue the second cloud on top of the other.
- Add some personality to the rainbow craft by adding self-adhesive googly eyes in the middle of the cloud and then give your cloud a cute smile with a black marker.
Let dry and enjoy!
- Special thanks to Fun365 for this amazing craft idea.
If you used did this craft post a picture and tag us on Instagram @raisinglittlegeniuses
Share this:


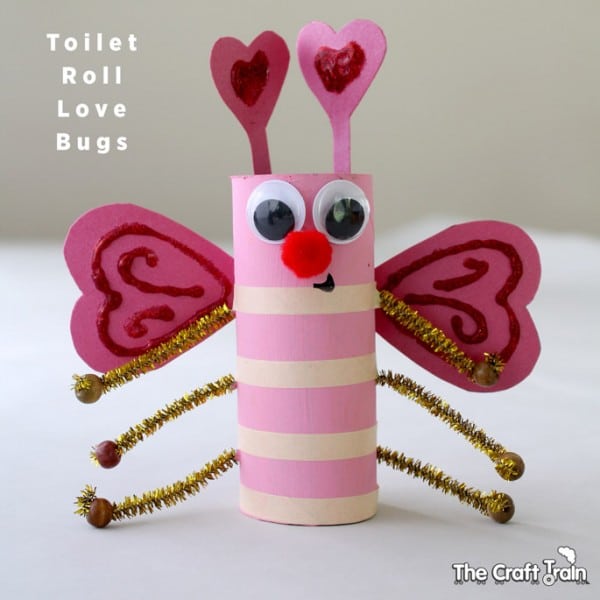
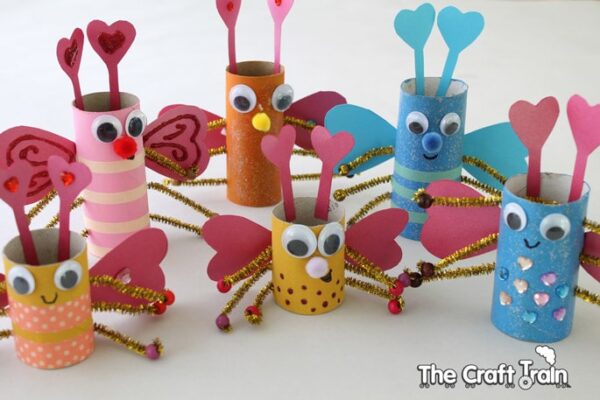
Toilet Roll Love Bugs for Valentine’s Day
Easy Love Bug Crafts for Preschoolers
The best Love bug craft for kids! I’m Kate and I blog over at The Craft Train, where we share crafty ideas for kids and parents. We are thrilled to be taking part in Red Ted Art’s ‘31 Days of Love‘ series once again.
LOTS of ideas to inspire you.. and now to these adorable Toilet Paper Roll Love bugs! Too cute!
Sponsored by Southwest AirlinesSale fares to celebrate our 50th birthday.Low fares for a getaway.SEE MORE
Kids love hearts, glitter, flowers and being creative so it is understandable that they are attracted to making Valentines Day crafts. They don’t really get the concept of ‘true love’ at this age, but that doesn’t mean that they can’t join in the fun and make some cool stuff. These Love Bugs are very simple to put together and the sky is the limit to how they can be designed and decorated. My five and six year old girls had a blast making these.
You will need a few basic supplies to form the base of these bugs, but when you get to the decorating part you can use whatever you fancy (or whatever you happen to have in the cupboard).
For your TP Roll Love Bugs, you will need:
You basically need toilet paper rolls and ANYTHING ELSE you can find in your craft statsh.. but we used:
– Toilet rolls or paper towel rolls cut to size.
– Paint
– Googly eyes
– Pipe cleaners
– Beads
– Construction paper
– Tacky craft glue
– Marker pens
– Scissors
– Skewer
How to make TP Roll Love Bugs for Valentine’s Day:
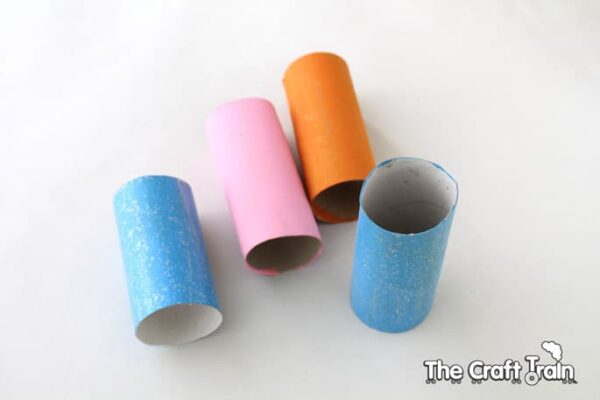
Paint some toilet rolls and allow them to dry. You can cut them down to a shorter length to get some smaller bugs if you like. We happened to have some ready-painted rolls stashed away in the craft box so we could get straight to the decorating.
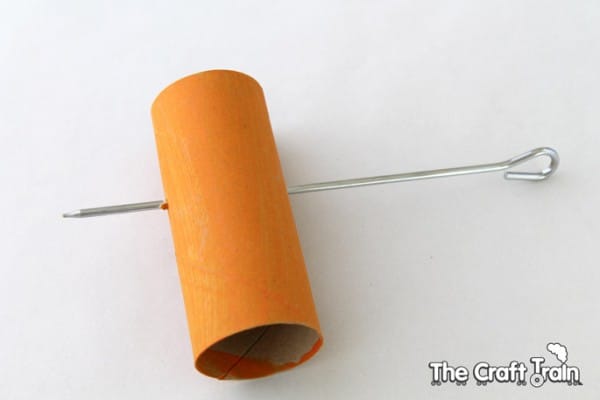
First, an adult needs to poke six holes with a kitchen skewer for the pipe cleaner legs to go through – that’s three down each side. Simply poke the skewer in one side and out the other three times.
Cut two pipe cleaners in half to get four pieces. Use three of the pieces to thread through the holes to make six legs, then attach a small bead to each end of the pipe cleaners to create hands and feet. You are now ready to add the details. You can also add some washi-tape stripes or decorate the body with stickers, markers, glitter glue etc.

To create the wings and antennae fold your piece of construction paper in half and draw a medium-sized heart for the wing shape and a small heart with a stem coming from the bottom for the antennae. Cut these out while the paper is folded in half so that you get two of each shape. Use tacky craft glue to attach the googly eyes and heart shapes last of all and leave to dry.
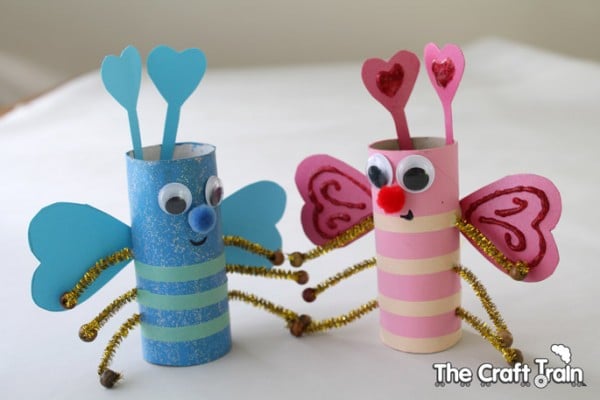
Aren’t these little love bugs cute? Such a fun little TP Roll craft for Valentine’s Day!
Share this:


A little laughter goes a long way
What did mommy spider say to baby spider?
You spend too much time on the web.
__________________________________________________________________
hahahahahaha- Have a great day!
Share this:


It’s craft time!
Did you know that we have a ton of fun crafts for you and your little genius to enjoy on our Pinterest page? Don’t miss a single moment of fun, click the link below.
Enjoy:
Share this:


Elf & Santa cupcakes
Get the kids involved in making these cute elf and Santa cupcakes with our template for the chimney-style paper cases
Ingredients
For the cupcakes
- 175g butter , softened
- 175g golden caster sugar
- 3 eggs
- 200g self-raising flour
- 1 orange , zested and 1/2 juiced
- pinch of cinnamon
- 1 tsp vanilla extract
For the icing
- 100g unsalted butter , softened
- 2 tsp vanilla extract
- 250g icing sugar , sifted
For the legs
- fondant icing sugar
- candy canes
- strawberry pencil sweets
- black, green and white fondant icing
- gold and silver balls
Method
- STEP 1Heat the oven to 190C/170C fan/gas 5. Line bun tins with paper cake cases. Put all the ingredients for the cupcakes in a large bowl using 4 tbsp of the orange juice, then beat together for 1-2 mins until smooth.
- STEP 2Spoon the cake mix into the cases, so they are three-quarters full. Bake for 15-18 mins or until golden and firm to the touch. Cool in the tin for 5 mins, then transfer to a wire rack.
- STEP 3For the icing, beat the butter, vanilla and icing sugar until pale and creamy, adding 1-2 tbsp warm water to loosen, if needed. Ice the cakes with a palette knife or use a piping bag to create swirls deep enough to hold the Santa and elf legs.
- STEP 4For the legs, make a batch of fondant icing following the pack instructions. Cut the candy canes and pencil sweets into 4cm lengths. Use green fondant icing to mould elf boots around the candy cane legs and black fondant icing to mould Santa boots around the strawberry pencil legs. Add some white fondant around the top of Santa boots. Use the made-up fondant icing to stick a silver or gold ball onto each toe of the elf boots. Let the boots dry completely. Use our chimney template, to make paper sleeves to wrap around the cupcake cases. Push the legs into the cupcakes just before serving.
Share this:


Jingle Bell Swag
Kids will love helping you make this sweet holiday noise maker. Have them thread the bells on the ribbon while you tie the bow. Hang on the front door, above the mantel, or at the end of a bed.
To make: Thread large jingle bells onto three lengths of ribbon; knot one end of the ribbon. Tie the unknotted end around a small wreath form or a length of wire shaped into a circle. Wire together a small bunch of seasonal greenery; attach to the wreath or circle form. Tie an oversized bow and hot glue to the wire just above the greenery.


You must be logged in to post a comment.